The Making of USS Aldebaran

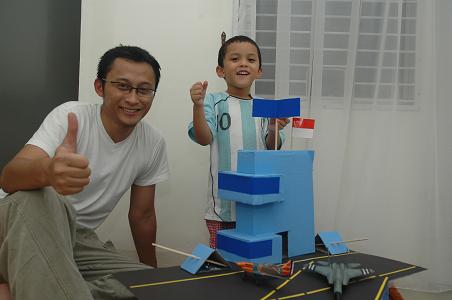
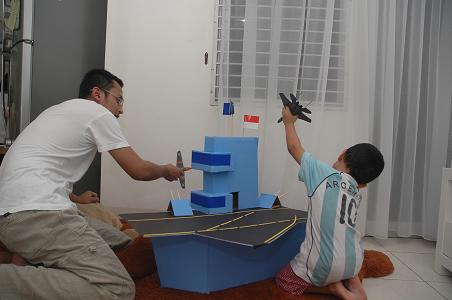
Lately Aldebaran (1st son, 4yo) has taken fondness in playing with toy planes. We have 5 planes from brand new ray (cheap but detailed), 3 of which we hang in his room and 2 broken ones that he plays with (hence hanging the remaining 3). Since I often play with the boys (more so with Aldebaran) I figured it’d be nice if we have an aircraft carrier to play along with.
Now, the sample came from the biggest toy set that toy brand GI Joe had ever issued. An air craft carrier called USS Flagg. (see below)
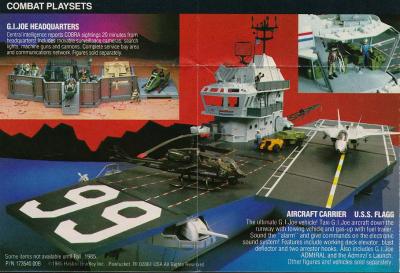
It’s massive and ubercool. Produced in 1985, worth USD 109.99 then in the US and no longer in production. It is now traded as collector’s item with value USD 100-600 depending on conditions. I came across the model several years ago and have been holding back from purchasing one due to price and transportation cost (most of these sold in US).
So I thought, let’s just make one based on this. A lot cheaper and have the values of teaching creativity and values about money to the kids.
Resources:
- Sticky papers (ready glue on 1 side). Color of your choice. Mine is Blue navy for the body, dark blue for the windows, black and orange for the runway.
- Chopsticks for the cannons.
- Double sided tape (not glue) just for sake of convenience. Since I am a very sloppy person with low level of craftsmanship, double sided tape is my choice.
- Corrugated cartons. Many of them.
- Corrugated plastic carton for the platform (runway).

Steps:
1. Boat building
Take a long box. Then take another piece of cartons and make lean front shape. Attach with double sided tape.

2. Control Tower structures
This one requires mid level precision. We need to ensure the tower is shaped like a descent tower and not shaped like your mother. Basically make 1 big rectangular box for the tower and 2 small boxes for the offices. After the big box is made, immediately cut out it’s sides so that the 2 small ones fit can fit nicely. As seen in the picture, the level of craftsmanship is poor hence not really aligned here and there. But, then that’s the best I can do.

3. Runway
First, attach the plastic carton ON the boat. Then attach the tower structure ON the plastic carton. This is to ensure that the plastic carton (runway) is firmly gripped by the 2 structures. After that, cut out the runways accordingly.


4. Cannons
Cannons are optional. To add excitement to the play, we made rotating cannons. It’s quite easy. Just punch a hole and attach them with a screw. In real carriers, cannons are not supposed to be placed on the runway. It’s supposed to be under it. But then the weight of the cannon can pull the runway, tilt the boat, etc etc, too complex, no thank you. Just make sure the cannons are small enough so that it doesn’t take the runway space. I didn’t manage to take the pictures on the making process, sorry.
A more comprehensive shape of cannons should have been made but then I thought, the boy is just 4 years old. He’ll probably smash this thing in a week or two. So I decided not to spend too much energy on the cannons.
5. Radars and flags
Cut a simple angled carton, make a small pocket upside down. It will create a hole. This hole will be a pocket for the pole and will allow it to rotate. There you go, rotating radar. This simple feature was later in fact, one of my son’s favourite.
6. Other features?
You can add the following:
- Anchors,
- Chimneys
- Antenna discs
Depending on how much time and energy you can afford. I decided not to make them.
7. Finishing
This step requires a high level of precision which I failed miserably. The ready stick cartons were a big help because glue are just so messy unless you’re very crafty (which I’m not). So, stick here and there with as least cuts as possible if you can. Why as least cuts? Aesthetics.
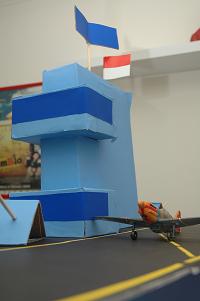

Mantle the runway with black carton to resemble runway tarmac. Stick orange lines to make it closer to reality.
Choose dark blue for the windows to ensure color contrast with the body of the tower structure.
Time spent was around 8 hours.
Money spent was around IDR 80K (USD $ 9). I only had to spend money for the tapes and color cartons. I was however mocked by colleagues in office for digging the trash cans for the cartons. Next time I will do that after 5 PM. So yeah, $ 9 and some dignity. Totally worth it.


wiihh..kreatif niy suami Mba Ninit!! bisa gantiin Mister maker mas Adhit..hehe..
mantap...jangan dikirim ke semenanjung korea yach hehehe...
@Thalia iya yang paling susah itu control towernya. Yang lama dalam proses pembuatannya adalah desainnya. karena bahannya karton maka jika terlalu banyak poongan dan selotip akan bikin letoy. jadinya rancangan harus se-sedikit mungkin potongan. tadinya desainnya ribet karena banyak lipetan tapi kemudian nemu kotak kertasnya sinar dunia yang udah langsung berupa boks dan kuat banget mutu kartonnya. Made life so much easier.
aduh seneng yah papa yang kreatif dan pasti bangga banget alde di bikinin sama papanya ..,good job ..:)
ihhh keren banget deh suami :p