
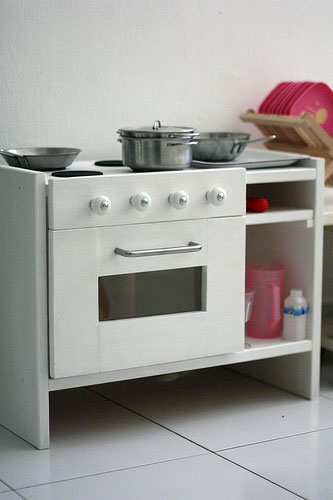
The idea behind this Play Stove is to make a wooden toy stove that is short enough for Aina (who was around 1.5 year old at that time) and costs less than $80 bucks — Singapore dollars. All wooden toy stoves in Singapore cost more than $150. We thought it would be more fun if we put it together ourselves and save some money along the way. I'm sure if you buy all these things in Indonesia, it would be much cheaper.
The toy stove made out of a lot of IKEA Products. I think, though, you can find these things anywhere else:
- A Rast bedside table
- A slab of wooden shelf
- Attest handle for the oven handle
- Lindsdal drawer knobs for stove dials
Other stuff:
- A small piece of acrylic glass from Art Friend for the oven window
- A piece of thick cork paper that i got from Daisho a long time ago.
- Two small hinges for oven door
- Magnetic lock
- Glazier tacks
- Wood putty
- White paint
- Wood glue
First, we made the Rast bedside table according to IKEA's instructions.

Then, we cut the wooden shelf to create:
- The divider between oven area and the shelf area on the right
- A small shelf
- Two thin strips to be glued to the sides for the small shelf to sit
- Stove knob panel
- Oven door: from four pieces of wood, glued together.
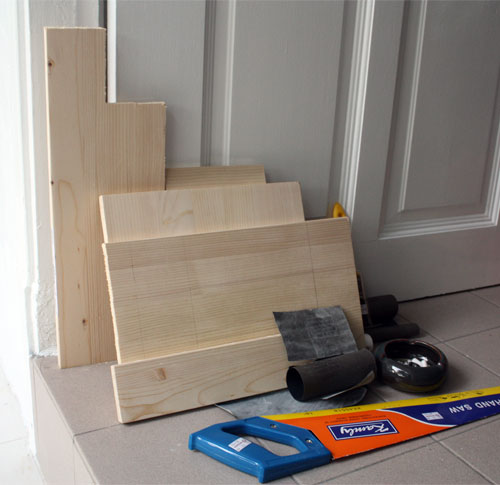
All of these pieces are to be sanded so the sides are smooth before we glued them together.
Putting it together:
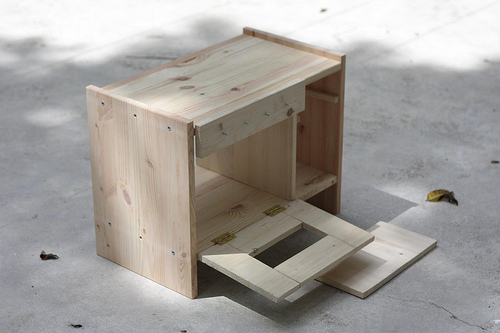
First, glue the divider on to its place and let it dry. After that, glue the two thin strips for the small shelf to sit on.
Before glueing the stove knob panel, don't forget to drill in and put the screws for the knob dials. It is easier to put them on now than later.
For the oven door, as soon as you finish glueing the four pieces together and forming a little window in he middle, install the oven handle. Once again, it's easier to put it on now than later.
After that, screw the hinges on to the oven door before attaching it to the stove.
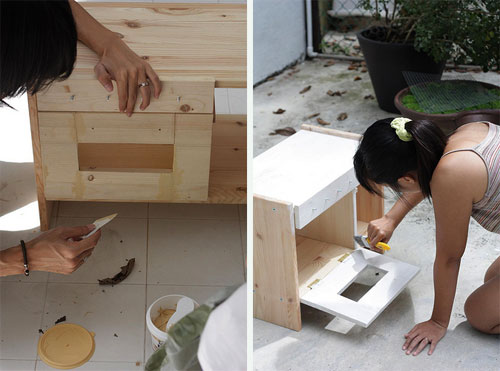
Then, we applied the putty to all the cracks and joints to smoothen everything.
Once the putty is dry, the little stove is ready to be painted. We painted two coats of paint, which i think is enough. It took us two days to get it dry, due to the rainy weather.
Then screw the magnetic lock to its place and you can secure the acrylic glass on to the oven window using glazier tacks.
For the stove top, we cut the cork paper into 4 circles and painted them with black acrylic paint. Then we glue them on top of the stove top for the pretend-burner.
That's it.
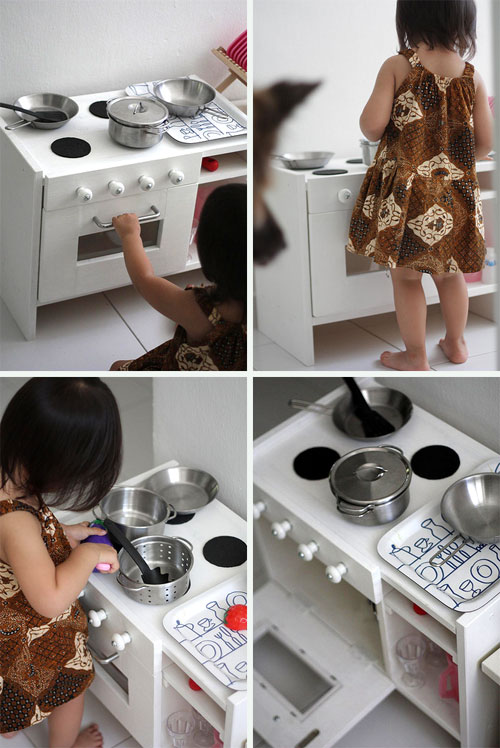
Although now, you probably need to give your kid some pots and pans to play with. We gave Aina some Play-Doh for her to cut and cook with.


edyaaan! keren banget binggi dan bubu!
Aaaaaaw...... lucu banget!!!
Pernak pernik masak2annya pun lucu n ngegemesin....
hebaaaat...
ehem.. kayaknya yang deket udah ngantri, deh.. iaaa... :P
sumpah!keren!!hebaaaaattttt Mbak!!!hehehe
Ini adalah maenan yg jadi impianku waktu kecil(yg tentu saja ga kesampean hehehe)
pengen ngikutin,tapi kayanya gakan bisa dech kikikiki(secara aku n suamiku sama2 pemalas heuheuheu)....kalo aina udah bosen, boleh juga tuh dihibahkan ke davina heheheh*ngarep*
@brenda - makasih, brenda :) bikinnya ampir 6 bulan lamanya, soalnya suami suka males dan mesti digebah2 dulu... jadi kalo pesen, jadinya pas Vanya umur 17 taun tuh kayaknya... hihhihi
@chint13 - hahaha, ini juga sebenernya yang lebih mau ibunya kok... naksir yang dijual di toko2, tapi ga kuat beli. akhirnya minta suami bikinin :P
@aini - iyaaa, betul banget! kalo gue masak, aina juga "masak" di kompor kecilnya.... hihihi.
@lia - aw, thank you, lia... :)